


Sports & Activities
Article Type
Percussive Therapy Tips for Baseball and Softball Throwers
Learn how this popular massage therapy method can help you get your throwing arm diamond-ready.
March 10, 2020
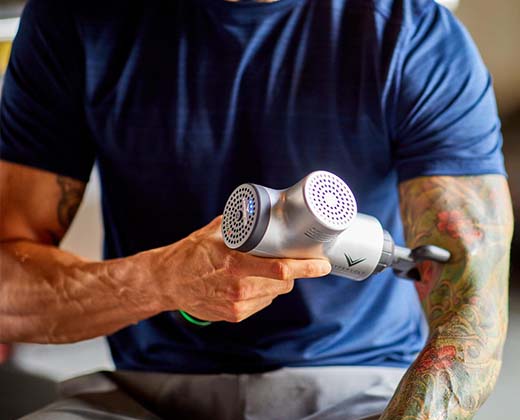
Warming up your arm for baseball or softball is a process that requires sufficient attention. The proper throwing progression can help you get ready for in-game action and keep you performing at full potential. However, getting your arm loose can take more than a simple throwing progression. Percussive therapy can be a great preparation method for throwing and help add variety to your routine.
There are a few key areas to target when warming up for baseball or softball with a percussive therapy device. Follow along with Hyperice’s Director of Business Development Joe Cannon as he outlines the right protocols for your warmup. Discover how to boost your prep work for your next baseball or softball game with this Pro Tips guide.
BEFORE WARMING UP
Prior to your percussive therapy session, be sure to choose the right percussive therapy attachment for your needs. While no option is incorrect, the various heads can affect your comfort level during your session. “You want to find the ones that work best for you based on certain body parts,” Cannon says.
HAND AND FOREARM
To begin your percussive therapy warmup session, start with your throwing hand. While there’s less muscle density here, you can still benefit from the vibration, according to Cannon. “This will be great to really put blood into those areas when you’re really going to be throwing the ball,” he says.
Moving up your arm, your next target area should be your forearm. Move up and down the muscles at a slow, controlled pace; Cannon recommends one inch per second. “I’m just really trying to experience the benefits of the vibration and circulation into those areas for warmup,” he adds. “If I find any spots that are, like, tighter or feel a little more sensitive, I’m going to spend some time there. I’m not really going to necessarily put more pressure, though you can if it feels nice.”
In addition, you can also change the axis of your percussive therapy device. For example, if you’re traveling vertically up your forearm, consider changing pathways and going horizontally instead. This, according to Cannon, can help you benefit from the vibration without a change in pressure.
BICEP AND TRICEP
Continue your baseball or softball throwing warmup by traveling up into your bicep region. Keep the same pace as before as you massage the muscle area. If you find any tense areas, feel free to give them more attention as well. Once your bicep is warmed up, Cannon states you can take your percussive therapy device and target your tricep as well.
CHEST
To target your chest and shoulder complex, Cannon says to begin your percussive massage below the collar bone on your pectoral muscle. “Obviously, the throwing motion, you have a lot in your shoulder complex here,” he says. “We want to open up the chest as much as possible to give us a little more space in the rotator cuff.”
Your pathway should move outward toward your armpit. Once you’re right below the shoulder cap, at the edge of the armpit, Cannon notes to lift your arm up slightly. “If you have a backstop or an area to stretch your arm back, this is a great way to open up that area,” he adds.
SHOULDER CAP AND ROTATOR CUFF
The next percussive therapy target area should be your shoulder capsule and rotator cuff. “This is just going to feel nice but just spend some time here – 30 seconds – and just find that spot that might be a little bit tighter,” Cannon says.
Warming up your shoulder cap and rotator cuff can be pivotal to your throwing performance. During your baseball or softball throwing process, this area can deal with multiple stressors through the motion. To maintain performance and to help avoid potential injury, take the necessary time to warm up.
LATS
In addition to your arm and shoulder areas, Cannon also suggests targeting your lats. Massaging this muscle group can help increase your range of motion, according to Cannon. “So, you’re going to hit right below where your shoulder capsule is, just down your side,” he says. “Not a lot of pressure here, because we’re going to be going over your ribs.”
When targeting your lats, Cannon notes to be mindful of your sub-scap area. This region, located right behind your armpit and just behind the ribcage, can be a good indicator of shoulder tightness. “This is a pretty nice spot to really increase that shoulder range of motion,” Cannon says.
TRAP AND SCAP
As a final area of focus for your percussive therapy warmup, you can target your trap and scapular musculature. This area around your shoulder blade can be a nice way to end your routine. “You can tilt your head each way and we’re going to go right up to the base of the skull or wherever it feels comfortable for you and work right down that trap area and then you can ride right into the back of that scap,” Cannon says.
Using percussive therapy to help improve your throwing warmup can help get your arm ready for the field. With these protocols, you can identify key areas for quick and efficient results.


© 2026 DICK's Sporting Goods
*Price Promotions - Due to manufacturer restrictions, select new release and other specified products are excluded from price promotions. Additionally, there are restrictions on the use of coupon codes.
If you are using a screen reader and are having problems using this website, please call 877-846-9997 for assistance.