How to Install Snowboard Bindings
When you hit the slopes, a wonky snowboard stance can throw off your game. Follow these five steps to set up a sturdy binding.
Let’s get into it: when snow first blankets the slopes in pristine sheets of powdery fun, it’s miraculous. Total transformation, overnight. Think of all the possibilities! You can wear snow pants, and boots or snowshoes. You can make snow angels, build a snowman, or sled down a giant hill.
Or, you can take it up a notch and grab a snowboard.
First things first: make sure you grab all the right gear. This means maximizing your safety on the slopes by properly aligning, angling and tightening your binding. To complete the task, most models only require a #3 Phillips-head screwdriver and a wrench or, in a pinch, a multi-tool.
Check out the five simple steps below.
CHOOSING THE PROPER BINDING
When purchasing your binding, know that most come with several different base plates to ensure compatibility. So even though two common binding interfaces exist (4x4 and 2x4), chances are any pick will do.
Beyond basic compatibility, your main concern will be size. Use your boot size to determine the proper fit.
ALIGN BOARD AND BINDING
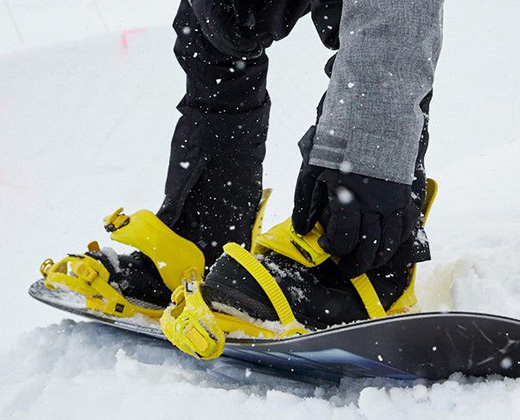
Align the slots of your mounting disc with the channels on the board. Next, insert the screws but only loosely tighten them, so you can adjust the bindings to fit your exact preferences.
ADJUST HORIZONTALLY
Now, set your stance width by moving the bindings up or down the board.
Many boards have marked center-stances for easy placement, but that placement won’t work for everyone. For beginners, the experts advise setting your feet to line up just outside of our shoulders, helping you initiate turns with your shoulders (like a pro) instead of your hips and lowering your center of gravity.
Once you’re boarding, pay attention to how that width feels. If you experience increased pressure on your quads or your turns feel too loose, try shortening your stance. Do your knees wobble too much around the curves? See if widening your stance helps.
SET YOUR ANGLES
Your angle of choice largely depends on your intended activity and level of skill.
If you plan on zipping around poles and other obstacles (such as in alpine or slalom skiing), you’ll likely prefer angling both feet toward the front of the board. For freestyle and progressive sessions, keep the toes pointed away from each other.
If you’re a beginner, angle the back foot at zero degrees and the front at fifteen degrees or less, commonly referred to as a “Duck Stance.” To get this angle just right, count the tick marks (called “splines”) on the mounting disc. Each mark accounts for three degrees of turn.
TIGHTEN THE SCREWS
If you’re unsure about the feel of your binding and stance, let a professional at the slopes take a look before you start. Safety always comes first.
When your stance feels comfortable, tighten those screws and maximize all that snowy goodness by hitting the slopes.


